How to Remove Limescale From a Glass Shower Screen in London’s Hard-water Reality

If your shower screen has turned from clear glass into a permanent fog of white spots and chalky film, London’s water is almost certainly to blame, and you are far from alone in fighting it. The capital sits on some of the hardest water in the country, and a glass shower screen is just about the most unforgiving surface that water can land on, showing every mineral deposit in sharp relief. The frustrating part is that the usual instinct – a quick wipe with whatever spray is under the sink – barely touches it, because limescale is not dirt and does not respond to ordinary cleaning. It is a mineral that has to be dissolved, not wiped. Get the chemistry right and a cloudy screen comes back to near-new clarity in an afternoon. Get it wrong, with the wrong product or an abrasive pad, and you can permanently damage the glass.

Why London Water Turns Your Shower Screen Cloudy

The chalk-aquifer reality behind hard-water limescale

To beat limescale it helps to know exactly what it is and why London suffers so badly from it. Much of the capital’s water is drawn from or filtered through the chalk and limestone that underlies the region, and as it moves through that rock it dissolves calcium and magnesium carbonates. The result is water that is rich in dissolved minerals – what we call hard water – and London consistently ranks among the hardest-water areas in the United Kingdom. Every time you shower, you are spraying mineral-laden water across the glass.

When that water dries, it evaporates and leaves the dissolved minerals behind as a solid deposit. That deposit is limescale: principally calcium carbonate, the same compound as the chalk the water came from. Each shower adds another microscopically thin layer, and because the screen rarely dries completely between uses, the layers build steadily into the cloudy, crusty film that resists every casual attempt to wipe it away.

The crucial point for removal is that limescale is alkaline, which is precisely why ordinary detergents fail against it – they are designed for grease and grime, not minerals. Limescale dissolves in acid, and that single fact underpins every effective method that follows. Understanding the enemy as a mineral deposit rather than as dirt is the shift that turns a hopeless scrubbing session into a quick, satisfying job.

First, Know What You’re Dealing With: Limescale vs Soap Scum

Telling mineral deposits apart from the greasy film

Before you treat the glass, it pays to identify what is actually on it, because shower screens usually carry two different problems that respond to opposite chemistry. Limescale is the hard, crusty, often spotty white deposit that feels slightly rough and is firmly attached. Soap scum is the greasier, smeary, duller film created when soap reacts with the minerals in hard water, and it tends to feel waxy rather than gritty. In a London bathroom the two almost always appear together, layered over one another, which is why a product that tackles only one leaves the screen looking little better.

The distinction matters because the two need different treatments. Limescale, being alkaline, is removed with acids such as vinegar or citric acid. Soap scum, being greasy and mildly acidic in character, often responds better to a degreasing or slightly alkaline cleaner. Throwing acid at a screen that is mostly soap scum, or detergent at one that is mostly limescale, explains a great deal of the frustration people feel when nothing seems to work.

The practical approach is usually to deal with the limescale first with an acid treatment, rinse thoroughly, and then follow with a degreasing wipe to lift any remaining soapy film. Doing it in that order means each problem meets the chemistry that actually defeats it, and the glass ends up genuinely clear rather than swapping one type of haze for another.

The Everyday Acid Method: Vinegar and Citric Acid

Why mild acids dissolve limescale and how to apply them safely

For everyday and moderate limescale, mild household acids are remarkably effective and cost very little. White vinegar, which contains acetic acid, is the classic choice. Citric acid, sold as a powder and dissolved in warm water, is just as good and has the advantage of a far less pungent smell – a real consideration in a small, enclosed bathroom. Both work by reacting with the calcium carbonate and converting it into soluble compounds that simply rinse away.

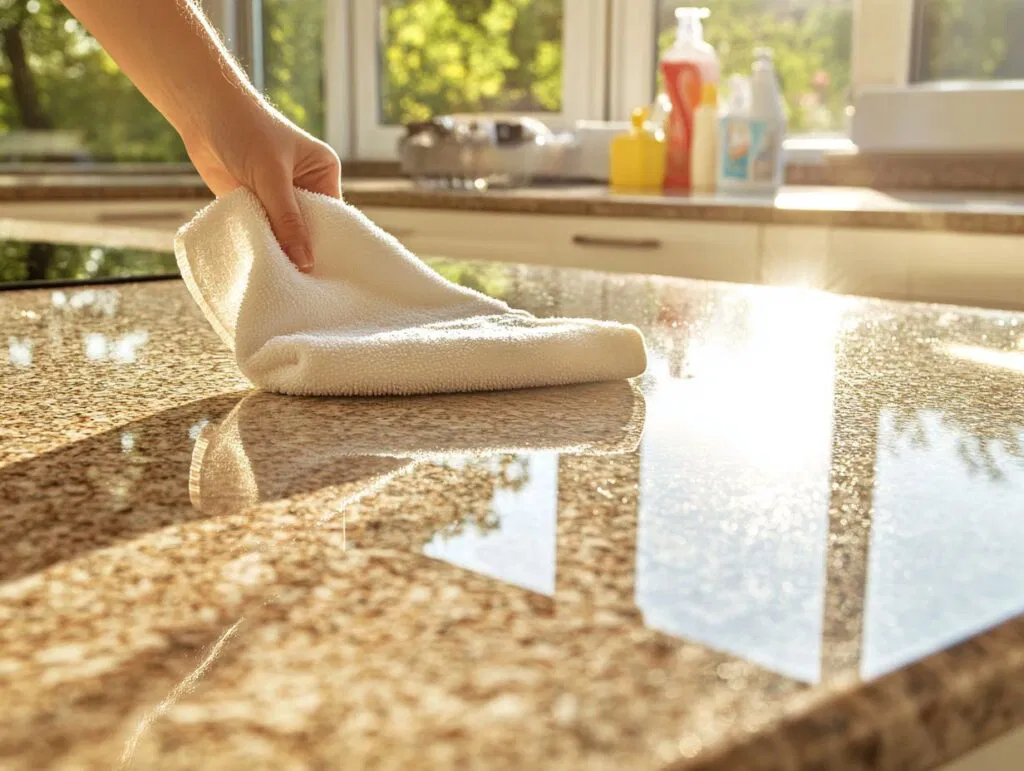
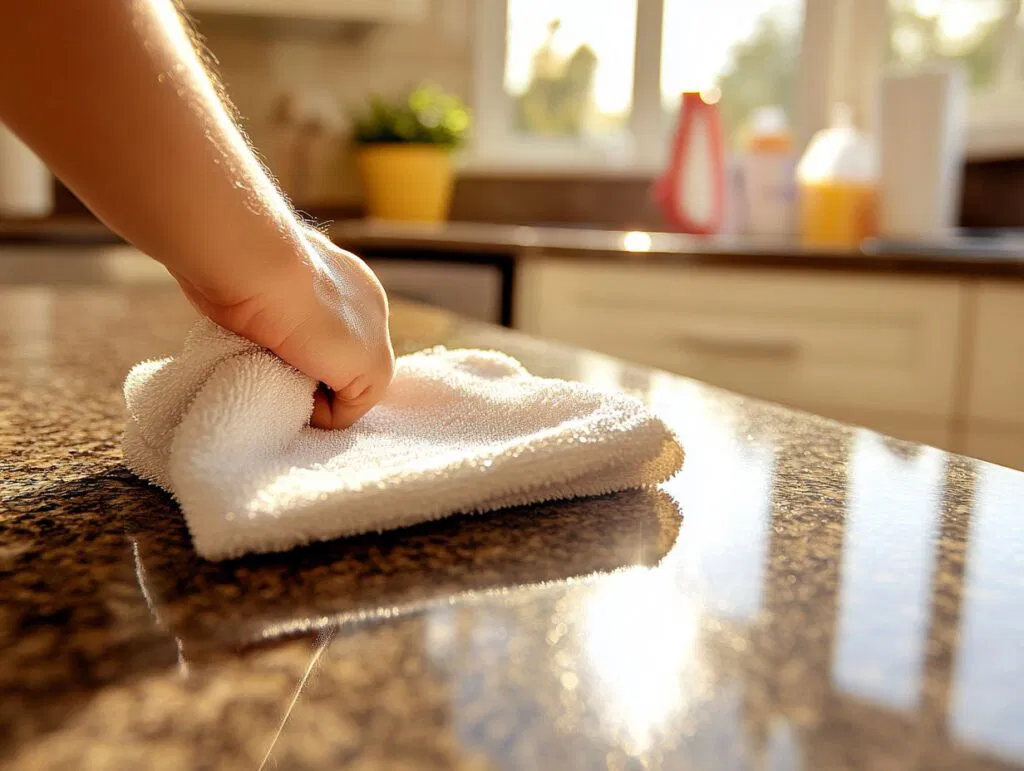
The key to success is contact time. A quick wipe achieves nothing because the acid needs minutes, not seconds, to dissolve the deposit. Warm the vinegar or citric acid solution slightly to speed the reaction, then keep it against the glass long enough to work. The most effective method is to soak paper towels or cloths in the solution and press them flat onto the vertical glass so they cling there, or to use a spray and reapply frequently so the surface never dries out. Leave it for fifteen to thirty minutes on stubborn areas.

After the dwell time, a non-scratch pad or a soft cloth lifts the softened scale easily, and a final rinse with clean water followed by a squeegee or microfibre buff leaves the glass clear. One safety rule overrides everything here: never mix any acid with bleach or bleach-based cleaners, as the combination releases toxic chlorine gas. Keep the bathroom ventilated and wear gloves, since even mild acids are unpleasant on broken skin.

Stubborn, Built-Up Scale: Stronger Tactics That Still Protect the Glass

Proprietary descalers, dwell time and what to avoid

When years of neglect have left a thick, crusty layer that mild acids only soften, it is time for stronger tactics – applied with more patience rather than more force. Proprietary limescale removers contain stronger acids, often formic or sulphamic acid, and are formulated to cling to vertical surfaces and cut through heavy deposits. Used according to their instructions, with the recommended dwell time fully observed, they will shift scale that household vinegar struggles with. A second or third application is far safer and usually more effective than reaching for anything abrasive.

The temptation with heavy build-up is to scrape or scour it off, and this is exactly the impulse to resist. Repeated treatment, letting the acid do the chemical work, is the route that protects the glass. For very thick spots, a plastic scraper or an old bank card held flat can lift softened scale after the acid has done its job, but metal blades and abrasive powders have no place near shower glass.

Coated or treated glass – many modern screens come with a factory applied water-repellent coating – needs particular care, because aggressive acids and abrasives can strip that coating and leave the glass performing worse than before. If your screen has such a coating, check what the manufacturer recommends and lean towards gentler, repeated treatments. When in doubt, test any strong product on a low, inconspicuous corner of the screen first and check the result before committing to the whole panel.

The One Mistake That Ruins Shower Glass for Good

Etched glass, abrasives, and why some cloudiness never comes off

There is one outcome worth understanding clearly, because it is permanent and entirely avoidable. Glass can be physically scratched by abrasive pads, scouring powders, wire wool and metal scrapers, and once it is scratched there is no cleaning it back to clarity – the marks are in the surface for good. This is why every method above leans on dissolving rather than scrubbing. A screen that looks hazy after cleaning is sometimes not still dirty but lightly scratched by a previous over-enthusiastic attempt.

There is also a subtler and more dispiriting form of permanent damage. When limescale is left on glass for years, particularly in a hard-water city, the minerals and the water can slowly etch and corrode the glass surface itself in a process sometimes called hard-water etching. The deposit effectively eats microscopic pits into the glass. When this has happened, the cloudiness is no longer a layer sitting on top that you can dissolve away; it is damage within the glass, and no amount of acid or effort will fully restore the clarity.

The lesson is twofold. Remove limescale before it has years to do this kind of harm, and never use anything abrasive in the meantime. If a screen remains permanently foggy after thorough, correct treatment, etching is the likely cause, and at that point replacement or professional polishing is the only real remedy rather than ever more aggressive cleaning.

Staying Ahead of It: Prevention in a Hard-water City

Squeegees, rinse aids, sealants and water softening

Removing limescale is satisfying, but in London the real victory is stopping it returning, and prevention is far easier than cure. The single most effective habit costs nothing: keep a squeegee in the shower and run it over the glass after every use. Limescale forms when mineral-rich water dries on the surface, so removing the water before it evaporates denies the scale the chance to form at all. A quick wipe with a microfibre cloth or towel does the same job.

Beyond that, several measures reduce the build-up between cleans. A water-repellent coating or sealant applied to clean, dry glass makes water bead and run off rather than cling, dramatically slowing deposition and making future cleaning easier – these need periodic reapplication but are well worth the effort in a hard-water area. A quick daily spray of a mild vinegar solution or a dedicated shower spray, left without rinsing, keeps light scale from establishing itself.

For a more fundamental fix, treating the water itself addresses the root cause. A water softener fitted to the supply removes the hardness minerals before they ever reach the shower, which not only protects the glass but extends the life of every appliance and fitting in a hard-water home. It is a larger investment, but in the chalk-fed reality of London water it is one that pays back across the whole property, not just the shower screen.

Removing Hair Dye Stains from Bathroom Sinks, Tiles, and Grout: The Complete Damage Control Guide

A dark splash of hair dye on a pale bathroom surface has a way of triggering immediate panic, and that panic is not entirely misplaced. Dye is engineered to bond permanently with whatever it touches, which is exactly what you want for your hair and exactly what you dread for your sink. The good news is that the surfaces in a bathroom are not made of keratin, and most of them can be brought back to their original state if you respond quickly and choose the right method for the material. The bad news is that the wrong approach – the wrong product, too much force, or simply waiting too long – can turn a recoverable splash into a permanent mark or, worse, damage the surface itself. This guide walks through what hair dye actually does to porcelain, ceramic, acrylic, tile and grout, and how to get each one clean without making the situation worse along the way.

Why Hair Dye Latches On So Fast (and Why Speed Matters)

The chemistry behind a stain that sets in minutes

Understanding why hair dye stains so aggressively is the key to beating it, because the same properties that make it so effective on hair are what make it cling to your bathroom. Permanent dyes work through oxidation: small colourless molecules penetrate a surface, then react with an oxidising agent such as hydrogen peroxide to develop into large coloured molecules that lock in place. On hair, this happens inside the shaft. On a bathroom surface, the same reaction is happening on and just below whatever the dye has landed on, which is why a stain that looks superficial can prove stubbornly anchored.

The decisive factor is time. While the dye is still wet and the colour-forming reaction is incomplete, much of it sits on the surface and lifts away with relatively little effort. Once it has fully oxidised and dried, the pigment has developed and bonded, and you are no longer cleaning a spill so much as trying to bleach out a finished colour. This is why the difference between wiping a splash immediately and discovering it an hour later is so dramatic. Porous and textured surfaces make everything worse, because the liquid wicks into tiny gaps and channels before it sets, giving the developed pigment far more to hold onto. Speed, then, is not just helpful but genuinely the most powerful tool you have, and it costs nothing.

First Response: What to Do the Moment Dye Hits a Surface

Blotting, rinsing and the mistakes that make it worse

The instinctive reaction to a dye splash is to grab a cloth and scrub, and that instinct, while understandable, can do real harm. Scrubbing a wet dye spill spreads the pigment outward, pushes it deeper into any texture, and can drive it into grout lines or scratches it would otherwise never have reached. The correct first move is to blot, not rub. Lay a clean, dry or damp cloth or paper towel onto the spill and lift the liquid away by pressing straight down, replacing the cloth as it picks up colour, until no more transfers.

Once you have lifted as much loose dye as possible, flush the area with plenty of cold water. Cold matters here, because warm water can accelerate the oxidising reaction you are trying to halt, effectively helping the stain develop. Keep the water moving across the surface rather than letting it pool, so the dye is carried away rather than spread around.

Work outwards from the edges of the spill towards the centre to avoid enlarging it, and resist the urge to reach for bleach or any strong product in this first minute. The immediate goal is simply removal and dilution. Only once the surface has been blotted and rinsed, and you can see what stain genuinely remains, should you move on to a targeted treatment chosen for the specific material you are dealing with.

Rescuing Sinks: Porcelain, Ceramic and Acrylic

Matching the method to what your basin is made of

Sinks are where dye splashes most often, and the right approach depends entirely on what the basin is made of. Glazed porcelain and ceramic, the materials in most traditional bathroom basins, have a hard, non-porous surface that resists staining reasonably well and tolerates fairly assertive treatment. For these, a paste of baking soda and water worked gently over the mark, or a cloth dampened with a little hydrogen peroxide left to sit for a few minutes, will usually lift a fresh stain. Stubborn marks on glazed ceramic can take a bathroom-safe bleach-based cleaner, applied briefly and rinsed thoroughly, since the glaze itself is not absorbent.

Acrylic and composite resin basins, common in newer and rented flats across London, demand more caution. These materials are softer, can be scratched by abrasive powders, and may be dulled or discoloured by harsh chemicals and undiluted bleach. Stick to non-abrasive methods here: a baking soda paste applied with a soft cloth, or a proprietary cream cleaner designed for acrylic, worked gently and rinsed away. Avoid scouring pads entirely, as the scratches they leave will trap dirt and dye far more readily in future.

Whatever the material, treat then rinse, and repeat the gentle treatment several times rather than escalating to something aggressive on the first attempt. A stain that fades a little with each pass is on its way out, and patience protects the surface in a way that brute force never will.

Tackling Wall and Floor Tiles

Glazed ceramic versus the special case of natural stone

Tiles divide neatly into two camps that must be treated very differently, and confusing the two is how genuine damage happens. Glazed ceramic and porcelain wall tiles, like glazed basins, have a sealed surface that gives dye little to grip. A splash on these usually responds to the same toolkit: a baking soda paste, hydrogen peroxide on a cloth, or a bathroom cleaner left to dwell for a few minutes before rinsing. Because the glaze is non-porous, the stain is almost always sitting on the surface rather than in it, which is encouraging news for removal.

Natural stone is the dangerous exception and deserves real care. Marble, travertine, limestone and slate are porous and, crucially, sensitive to acids. Many common stain removers, along with vinegar and some proprietary cleaners, are acidic enough to etch stone, leaving a dull, rough patch that is permanent and often more noticeable than the dye stain itself. On natural stone, avoid anything acidic and avoid bleach, and reach instead for a stone-safe poultice – a paste that draws the stain up and out of the pores as it dries. A pH-neutral stone cleaner is the safe everyday choice.

If you are unsure which type of tile you have, test any product on an inconspicuous corner first and wait to see the result. The few minutes this takes can save you from swapping a removable stain for an irreversible mark on an expensive surface.

The Grout Problem: Porous, Pale and Unforgiving

Why grout holds dye and how to draw it back out

Grout is the single most troublesome surface in this whole scenario, and it is worth understanding why before you attack it. Standard cement-based grout is highly porous, riddled with microscopic gaps that soak up liquid like a sponge, and it is very often pale or white, offering maximum contrast for a dark stain to show against. When dye reaches grout, it does not sit politely on the surface; it wicks down into the body of the material, which is why a grout stain can look as bad after surface cleaning as it did before.

Because the pigment is held below the surface, the trick is to draw it back out rather than wipe it off. A paste of baking soda and hydrogen peroxide, or a little oxygen bleach mixed into a thick paste, applied directly along the grout line and left to work for ten to fifteen minutes, gives the treatment time to penetrate and lift the colour. An old toothbrush lets you work it gently into the line without spreading dye onto surrounding tiles. Several patient applications usually outperform one aggressive scrub.

For grout that simply will not surrender, two further options remain. A grout pen or grout paint can cover a stain that has been cleaned as far as it will go, restoring an even colour. As a last resort, the top layer of grout can be raked out and refreshed. Sealing grout once it is clean and dry is the best protection against the next splash soaking straight back in.

Products That Work, Products That Wreck, and Knowing When to Stop

Building a safe escalation ladder and recognising a set stain

Pulling the methods together, the safest way to approach any dye stain is as a ladder you climb one rung at a time, starting gentle and escalating only as needed. The bottom rung is cold water and blotting, followed by a baking soda paste, then hydrogen peroxide, then oxygen bleach on a paste, and only at the top, on glazed and non-porous surfaces alone, a chlorine bleach product used briefly and rinsed well. Climbing slowly means you stop at the first thing that works and rarely reach for anything strong enough to risk the surface.

Some combinations should never be climbed towards at all. Never mix bleach with anything containing ammonia, and never combine different cleaning chemicals in the hope of a stronger result, as the fumes produced can be genuinely dangerous in an enclosed bathroom. Always ventilate, always wear gloves, and always rinse one product away fully before trying another.

There comes a point where a stain is simply set, particularly on porous grout or natural stone that has been left for days, and recognising that point saves both effort and the surface. A mark that has not shifted at all after several patient treatments is unlikely to yield to more of the same, and continued aggressive cleaning will damage the surface long before it removes the colour. At that stage, cosmetic solutions such as grout renewal, or professional restoration for stone and high-value finishes, become the sensible path – and in a rented London flat where a stained basin or floor could threaten a deposit, bringing in experienced help is often cheaper than the alternative.

Why Your Vacuum Cleaner Smells Burnt (And When to Actually Start Worrying)

A vacuum that suddenly gives off a hot, acrid smell mid-clean is unsettling, and the first question most people ask is whether the thing is about to catch fire or simply having a bad day. The honest answer is that it depends entirely on what kind of burnt smell it is and what your machine was doing when the odour appeared. A faint rubbery whiff after twenty minutes on a thick carpet is a very different problem from a sharp electrical stink that fills the room within seconds of switching on. Most burnt smells are mundane, fixable in ten minutes with no tools. A small minority are a genuine warning that something is overheating to the point of risk. Learning to tell those two apart is far more useful than either ignoring the smell or binning a perfectly good machine, so it is worth understanding what is actually happening inside the casing.

What That Burnt Smell Is Actually Telling You

Reading the difference between rubber, dust and electrical odours

Not all burning smells mean the same thing, and your nose is a more useful diagnostic tool than you might expect. Broadly, vacuum odours fall into three families, and identifying which one you are dealing with narrows the problem down immediately.

A hot rubber smell, slightly sweet and reminiscent of car tyres, almost always points to the drive belt – the rubber loop that spins the brush roll. A dusty, scorched smell, more like hot dust on a radiator, usually means the motor is running hot because something is restricting airflow. The one to take seriously is a sharp, chemical, electrical smell, the sort you might associate with an overloaded plug or melting plastic, which suggests the motor windings or wiring are overheating rather than just the air around them.

Timing tells you almost as much as the smell itself. An odour that builds gradually over a long cleaning session leans towards a benign cause such as a warm motor or a tired belt. A smell that appears within seconds of switching on, or comes with a change in the motor’s pitch, smoke, or the machine cutting out, belongs in the worrying category. Before you reach for any fix, switch off, unplug, and work out which family of smell you are dealing with.

The Usual Suspect: A Slipping or Burning Drive Belt

Why belts overheat and how to spot a failing one

In an upright or any vacuum with a powered brush roll, the drive belt is the single most common source of a burnt smell, and the good news is that it is also one of the cheapest and easiest things to put right. The belt is a thin rubber band that transfers spin from the motor to the brush roll. When the brush roll is hard to turn – because it is jammed with hair, wedged against debris, or its bearings are stiff – the motor keeps spinning while the belt struggles to move it. That friction heats the rubber, and hot rubber smells exactly like what it is.

You can usually diagnose this without tools. Turn the machine off, unplug it, and try to spin the brush roll by hand. If it will not turn freely, or the belt looks stretched, glazed, cracked or has flat spots worn into it, the belt is your answer. A belt that has snapped entirely often leaves a stronger burnt smell at the moment it goes, along with a brush roll that no longer spins at all even though the motor sounds normal.

Belts are wear items, much like brake pads on a car, and most are designed to be replaced periodically. Across the dusty, high-traffic flats and houses of London, where carpets see plenty of grit tracked in from the street, belts tend to wear faster than the manuals suggest. Replacing one is usually a matter of removing a base plate, slipping off the old belt and looping on a new one, and it costs very little.

Blockages and Overheating: When Airflow Gets Choked

How a clogged hose, full bin or dirty filter cooks the motor

Vacuum motors rely on a constant stream of air not only to lift dirt but to cool themselves. Choke that airflow and the motor has no way to shed its heat, so it runs hotter and hotter until it either trips its safety cut-out or starts to smell of scorched dust. This is probably the second most common cause of a burnt odour, and it accounts for a great many machines that get written off when nothing is actually broken.

The culprits form a predictable list. A bag or bin filled past the line restricts airflow long before it looks completely full. Filters – foam, felt or HEPA – clog with fine dust over months of use and are very often the forgotten component, especially in homes that have never had them cleaned or swapped. Hoses and wands trap blockages, and in older conversion flats a sock, a hair clip or a wad of compacted fluff can lodge out of sight and slowly strangle the suction.

The fix is methodical rather than technical. Empty the bin or change the bag, remove and wash or replace the filters according to the manual, and check the full airflow path from floorhead to motor for obstructions. A coin dropped down a detached hose should rattle straight through; if it stops, you have found your blockage. Many machines also have a thermal cut-out, so if yours keeps stopping and restarting after it cools, treat that as a strong hint that something is overheating and choking for air.

The Brush Roll Problem (Especially in Pet and Long-Hair Households)

Tangled bristles, seized bearings and the friction smell

The brush roll deserves its own attention because it sits at the root of so many belt and overheating problems, and because some homes punish it far harder than others. Long human hair, pet fur and carpet fibres wrap themselves around the roller with remarkable persistence, building into tight bands that wind around the ends near the bearings. Once that happens, the roller drags, the belt fights to turn it, and you are back to the hot rubber smell described earlier.

Households with dogs, cats or long-haired occupants – a fair share of London flats – see this constantly, and the build-up can be surprisingly invisible until you look closely. Switch off and unplug, then run your fingers along the brush roll. If you find hair wound tightly at either end, a pair of scissors or a seam ripper makes short work of cutting it free, after which the roller should spin smoothly again.

A second, less common issue is the bearings the brush roll spins on. Over years of use these can dry out or seize, so even a clean roller turns stiffly and generates friction heat. If the roller is clean but still will not spin freely by hand, worn bearings or a bent roller may be to blame, and on many machines the whole brush roll assembly can be replaced as a single inexpensive part.

When the Motor Itself Is the Problem

Recognising electrical burning and a genuinely failing motor

If you have ruled out the belt, cleared every blockage, washed the filters and freed the brush roll, and the smell persists, the motor itself moves up the list of suspects. This is the more serious end of the diagnosis, though it is also the least common, and it is worth approaching calmly rather than assuming the worst.

A motor that is genuinely failing tends to announce itself in ways the earlier causes do not. The smell is sharper and more chemical, closer to burning plastic or hot electrics than warm rubber or dust. You may notice the motor labouring, changing pitch, sounding rougher than usual, or sparking visibly through the vents – many vacuum motors have carbon brushes that spark a little in normal use, but heavy or constant sparking is not normal. In the worst cases there is visible smoke or a smell that lingers in the room long after the machine is switched off.

A motor reaching the end of its life, with worn carbon brushes or degrading winding insulation, will overheat regardless of how clean and clear the rest of the machine is. At this point the honest assessment is whether the vacuum is worth repairing at all. Motor replacement is a significant job and often costs a large fraction of a new machine, so on cheaper models it rarely makes financial sense. An electrical burning smell from the motor is not something to keep using through.

When to Actually Start Worrying (and What to Do About It)

Telling a quick fix from a fire risk or a write-off

Pulling all of this together, the line between a minor annoyance and a real worry is clearer than the alarm of the moment suggests. A warm or rubbery smell that fades once you clean the filters, clear a blockage, free the brush roll or fit a fresh belt is firmly in the routine-maintenance category. These machines are not dangerous; they were simply asking for the upkeep every vacuum needs, and they will go back to running normally once you have dealt with the cause.

The signs that warrant genuine concern are worth committing to memory. Smoke, visible sparking beyond the faint flicker of healthy brushes, a sharp electrical or melting-plastic smell, a casing that is too hot to hold comfortably, or a machine that repeatedly cuts out and will not stay running all mean the same thing: stop, switch off, and unplug at once. A vacuum is a high-powered electrical appliance full of fine, flammable dust, and an overheating motor near that dust is the one scenario that carries a real fire risk, however rare it is in practice.

When you reach that point, the sensible response is to stop using the machine entirely rather than persevering in the hope it settles down. Depending on the age and value of the vacuum, that means either a proper repair by someone competent with electrical appliances or accepting that the machine has come to the end of its working life. Either way, a burnt smell is information, and reading it correctly lets you fix the small things quickly and respect the few that genuinely deserve your caution.

How to Deep Clean Your South London Flat During a Heatwave Without Sweating to Death

Deep cleaning a flat in the middle of a July heatwave sounds like a punishment invented specifically for South London. The mercury climbs past thirty, the top-floor conversion you rent in Brixton or Tooting starts behaving like a greenhouse, and somewhere in the back of your mind a voice suggests that the skirting boards can wait until October. That voice is wrong, but only partly. You can absolutely deep clean during a heatwave, and you can do it without ending up flat on the kitchen floor wondering whether you’ve given yourself heatstroke. The trick is that you don’t clean harder when it’s hot – you clean smarter, in the right order, at the right hours, with a few methods borrowed from people who do this professionally through every London summer. What follows is a practical approach that gets your flat genuinely fresh while keeping your body well within its limits.

Why South London Flats Turn Into Ovens (and What That Means for Cleaning)

Understanding heat behaviour in conversion flats and period terraces

Much of South London’s housing stock works against you in a heatwave, and it helps to understand why before you pick up a single cloth. The Victorian and Edwardian conversions that fill Dulwich, Peckham, Streatham and Camberwell were built for warmth retention, not summer cooling. Solid brick walls that hold heat beautifully in January release it slowly into your rooms all evening in August. Single-aspect flats, where every window faces the same direction, get no cross-breeze at all. West-facing living rooms bake through the afternoon, and original sash windows that have been painted shut over decades of redecoration leave you with no real ventilation when you need it most.

This matters for cleaning because heat changes the chemistry of the job. Cleaning solutions evaporate far faster on a hot surface, so sprays dry before you’ve had a chance to wipe them, leaving streaks on glass, mirrors and worktops. Warm rooms intensify the fumes from stronger products, turning a manageable task into a headache – sometimes literally. And heat-generating jobs like oven cleaning become genuinely punishing when the surrounding air is already pushing thirty degrees. Recognising all this is the difference between fighting the conditions and working with them. You are not cleaning the same flat you clean in spring, so it makes no sense to clean it the same way.

Timing Your Deep Clean Around the Heat

Building a cool-hours cleaning schedule

The single most effective thing you can do is stop treating the deep clean as one continuous event and start treating it as a series of sessions slotted into the coolest parts of the day. In a London heatwave, that generally means before roughly ten in the morning and after about seven in the evening, when the sun is off the worst-affected rooms and the air has dropped a few degrees. The middle of the day, from late morning through to early evening, is for resting, hydrating and staying out of the heat – not for scrubbing.

Match the task to the window. The early-morning slot, when both you and the flat are at their coolest and your energy is highest, is the time for anything physically demanding or heat-generating: the oven, the bathroom, heavy kitchen work, anything involving hot water or steam. The evening slot suits lighter, cooler work – dusting, tidying, wiping down surfaces, sorting and decluttering. Spreading a full deep clean across two or even three days rather than forcing it into a single brutal Saturday is not laziness; it is the approach that actually gets the whole flat done to a high standard. Between sessions, keep the place liveable by doing a quick reset of each finished room so you are not living in a building site while you wait for the next cool window to open.

Prepping the Flat (and Yourself) to Stay Cool

Ventilation, hydration and kit that does the heavy lifting

Before you clean anything, set the flat up to stay as cool as it can. The instinct to fling every window open is often the wrong one. On a genuinely hot day, the outside air can be warmer than the air inside, so opening up at the wrong time simply lets the heat in. The better rhythm is to ventilate hard during the cool hours – early morning and late evening – to flush warm air out and pull cooler air through, then shut the windows and draw blinds or curtains on the sunny side once the temperature outside climbs. A darkened, closed-up room in the afternoon stays markedly cooler than one with the sun streaming in.

Look after yourself with the same seriousness you’d give the flat. Wear loose, light clothing, keep a large bottle of water within reach and actually drink from it rather than promising yourself you will later, and learn to notice the early signals of overheating – a thumping head, a faint wave of dizziness, skin that has stopped sweating. None of these are signs to push through. On the kit side, let your equipment carry the load instead of your arms. Microfibre cloths lift dust and grime with far less effort than old rags and a bucket of hot water. A spray-and-wipe approach beats heavy mopping. Cordless vacuums spare you from wrestling cables in the heat. Wherever a job can be done with cold or room-temperature water rather than hot, choose the cooler option – your flat does not need any more warm steam in it.

Room-by-Room: The Low-Sweat Deep Clean Order

Working from coolest to hottest spaces

Order is everything when the temperature is against you. The principle is simple: tackle the coolest rooms while your energy is high and the flat is still fresh, and save the hottest, most demanding spaces for the very start of the day rather than the worst of the afternoon. In practice that means starting with the bedroom and living room, then approaching the kitchen and bathroom strategically rather than trudging into them at peak heat.

In the bedroom and living room, work top to bottom. Dust first, beginning with high surfaces, picture rails and shelves, then deal with skirting boards and finish with the floor, so anything you dislodge ends up getting cleaned up rather than resettling on a surface you’ve already done. Clean mirrors and any glass while they are out of direct sunlight, because sun on glass dries your cleaner in seconds and guarantees streaks. The kitchen is best taken early in the morning, with the oven done cold before the room has had any chance to warm – a cold oven is also far more pleasant to lean into than a residually warm one. Leave a degreaser to dwell while you step away rather than scrubbing in a hot, enclosed space. The bathroom is often your ally here, as it tends to be the coolest, most shaded room in a South London flat, which makes it a sensible place to retreat to and a comfortable one to deep clean even as the day heats up.

Heat-Friendly Products and Methods

What to reach for (and what to skip) when it’s sweltering

What you clean with matters more in a heatwave than at any other time of year. Strong solvent-based cleaners and bleach become noticeably more unpleasant in warm, poorly ventilated rooms, as heat lifts their fumes into the air far more readily. In a stuffy, shut-up flat that has been baking all afternoon, those vapours linger and concentrate, which is bad for your head and worse for your lungs. Lean towards milder, lower-odour products where you can, and reserve anything heavy-duty for the cool early hours when you can ventilate properly while you work.

The streaking problem deserves particular attention. Any job involving glass, mirrors or polished surfaces should be done in shade or during the cooler hours, never with the sun directly on the surface, or you will simply be redoing it twenty minutes later. There is, oddly, an advantage hidden in the heat. Because the conditions force you to work in shorter bursts with rests in between, you can put that enforced pause to good use by letting products do the work for you. Spray a limescale treatment around the bathroom or a degreaser across the hob, then sit down somewhere cool with your water while it dwells. By the time you come back, much of the loosening has happened on its own, and a slower pace stops being a frustration and becomes part of the method.

Knowing When to Stop (and When to Call It In)

Recognising heat limits and the case for professional help

The most important section is the one about stopping. A deep clean is not worth your health, and the warning signs of heat exhaustion are not things to negotiate with. Dizziness, nausea, a persistent headache, cramping muscles, feeling suddenly weak or unusually cold and clammy in the heat – any of these means you stop immediately, get somewhere cool, and drink water. Pushing through is not toughness; it is how a manageable afternoon turns into a genuine medical problem. The cleaning will still be there tomorrow morning, in the cool, when you are in a fit state to finish it.

It is also worth being honest about the jobs that simply should not be attempted solo in a heatwave. A large flat, a full end-of-tenancy turnaround against a deadline, or a property that has been left in a heavy state are all demanding even in mild weather, and a heatwave stacks the odds against finishing well without overheating. Bringing in a domestic cleaning team that works across Greater London, with the kit, the numbers and the experience to get it done efficiently, is a sensible response to difficult conditions rather than any sort of failure. However you approach it, the central point holds: a genuinely clean, fresh flat and a body that has not been pushed past its limits are not competing goals. With the right order, the right hours and a bit of respect for the heat, you can have both.

The Right Way to Clean and Maintain Granite Countertops

Granite countertops are a stunning addition to your home, bringing beauty, durability, and a touch of class to your kitchen. And though they may seem impervious to damage, you should never neglect their maintenance and regular cleaning.

This guide will help you understand granite, highlight its benefits, and share effective cleaning techniques and recommended products. You’ll also learn about common mistakes to avoid and when it might be time to call in the professionals for expert care.

A person putting a white cloth on a granite kitchen countertop

Why Is Granite Among The Most Preferred Materials For Kitchen Countertops?

Granite is a tough, natural stone formed from cooled magma, so it’s a top pick for residential kitchens and home improvement projects. You’ll love granite countertops for their remarkable strength and features like heat and scratch resistance. Plus, they come in unique colours and textures that can fit just about any kitchen design.

Granite forms deep within the Earth’s crust, where molten rock solidifies over millions of years. This lengthy process leads to different types of granite, like biotite, muscovite, and pegmatitic varieties, each bringing its unique flair to your kitchen aesthetics.

With its durability, granite is a smart choice for surfaces that need to handle daily wear and tear while adding a touch of timeless elegance. Its natural stone qualities ensure longevity and help create a hygienic kitchen environment, making it a win-win for both practical and design-savvy homeowners like you.

Benefits of Using Granite Countertops

Granite countertops offer many benefits that make them a fantastic choice for your kitchen. Their amazing durability promises a long lifespan and adds a touch of elegance and beauty to your kitchen’s look, making them perfect for any home improvement project.

These surfaces are tough against scratches and heat, and they’re super easy to maintain—all it takes is a quick wipe-down to keep them looking pristine. Granite has natural antimicrobial properties, which boost food safety by keeping bacteria at bay. That’s a smart choice for your food prep areas.

But it’s not just about practicality. Granite’s unique veining and colour variations can elevate your kitchen design, giving it a luxurious vibe that standard countertops can’t match. This versatility allows you to blend them effortlessly with any style, whether you’re going for modern or traditional, making your kitchen the welcoming focal point of your home.

Cleaning Granite Countertops

Cleaning your granite countertops is key to keeping them looking beautiful and extending their lifespan. Effective cleaning techniques and the right products can protect the surface integrity of your granite.

This way, it stays a stunning focal point in your kitchen.

Recommended Cleaning Products

Using the right products to clean your granite countertops is essential for keeping them shiny and durable. Look for non-abrasive and pH-balanced cleaners specifically made for granite. These will help you clean effectively without harming the surface.

If you’re considering commercial options, granite-specific cleaners are a great choice. They usually contain gentle surfactants that lift dirt while being safe for your stone’s finish. But if you’re in a DIY mood, a simple mix of water and mild dish soap or a vinegar-water blend can work well, too. Be careful with the vinegar; its acidity can be harsh if used too often.

Always take a moment to check the ingredients, as some household cleaners can contain harmful chemicals that might wear down your granite over time. Whether you choose a store-bought product or whip up a homemade solution, the goal should be safe and effective cleaning methods that keep your granite looking great for years to come.

Proper Cleaning Techniques

Utilizing the right cleaning techniques is crucial for preserving the beauty and integrity of your granite countertops. Daily cleaning with soft sponges and microfiber cloths can help prevent stains and keep that brilliant shine intact. You’ll want to dive into deeper cleaning methods regularly to tackle tougher grime and ensure your granite stays in great shape.

To get the best results, use pH-balanced cleaners specifically made for natural stone. This will avoid etching and dullness. A soft-bristle brush can also be your best friend for removing any embedded debris without scratching the surface.

Consider applying a sealant every year or so to boost protection against spills and stains, since granite can be a little porous. Sticking to these routines keeps your countertops looking fabulous and creates a more hygienic kitchen environment, making your cooking experience all the more enjoyable.

A person polishing a granite kitchen counterop with a white cloth

Maintaining Granite Countertops

Regular maintenance is key to keeping your granite countertops looking their best. Knowing how to maintain granite through routine upkeep and preventive care will help you avoid expensive repairs and ensure your beautiful surfaces stay pristine for years to come.

Preventing Stains and Damage

Preventing stains and damage to your granite countertops is key to keeping them beautiful and durable. Using simple preventative care techniques—like steering clear of acidic substances and quickly cleaning up oil or water stains—you can protect your granite from unsightly marks and help it last longer.

Another smart move is regularly sealing your granite, which creates a protective barrier against spills and scratches. You should also be mindful of using cutting boards and coasters; these little tools can really reduce the risk of damage.

Acting fast is crucial when a spill happens, especially with wine or vinegar. It’s better to blot rather than wipe to avoid spreading the mess. And don’t forget to use gentle cleaning solutions and soft cloths; this way, you can keep the surface shiny while preventing scratches. That way, your granite lasts and continues to impress anyone who sees it.

Regular Maintenance Tips

Regular maintenance is key to keeping your granite countertops looking stunning and functional. By setting a cleaning schedule and adding granite sealing to your routine, you can extend the life of those beautiful surfaces.

To keep your granite’s natural beauty intact, it’s a good idea to clean the surfaces daily using a pH-balanced cleaner. This will help prevent any buildup of dirt and oils. For a deeper clean, using a more specialized granite cleaner once a week will help maintain that lovely lustre.

Don’t forget to apply a high-quality granite sealer every 6 to 12 months; it creates a protective barrier that reduces the risk of stains and etching.

Steer clear of acidic or abrasive cleaners, though, as they can really mess up the surface. By using these techniques and products, you can enjoy the durability and elegance of granite for years to come.

Common Mistakes to Avoid

Avoiding common mistakes is crucial when cleaning and maintaining your granite countertops. Many homeowners get caught up in granite myths or make cleaning errors that can cause irreversible damage to those beautiful surfaces.

So, you need to know what to steer clear of.

Cleaning and Maintenance Errors

Cleaning and maintenance errors can mess with the hygiene and appearance of your granite countertops. You might be tempted to reach for harsh, abrasive cleaners or skip out on regular upkeep, but those choices can lead to scratches and etching you don’t want.

These little oversights can dull the surface and create a cosy home for bacteria, which is not exactly a health win. To avoid these pitfalls, it’s best to use pH-balanced, gentle cleansers made just for natural stone.

Don’t forget about sealing your countertops regularly—that’s key to preventing stains and keeping your granite looking great for longer. By sticking to a consistent maintenance schedule and being mindful of the cleaning products you use, you can easily keep your granite surfaces elegant and durable while ensuring your kitchen stays safe and hygienic.

Professional Granite Countertop Care

Regarding granite countertops, you’ll find that professional care can enhance their appearance and extend their lifespan.

Whether you need granite repair, refinishing, or restoration, sometimes it’s just best to call in the pros to tackle issues beyond maintenance and care.

When to Seek Professional Help

Knowing when to call in the pros for your granite countertops is key to keeping them looking great and functioning well. If you spot deep scratches or significant stains or you’re considering a granite restoration kit for a big overhaul, it’s probably time to reach out to an expert.

If you notice that water isn’t beading on the surface like it should, or if you see chips or cracks that might get worse, those are signs that you need to take action. Waiting too long to get professional help can ruin the look of your countertops and lead to some pricey repairs later on.

Getting a specialist involved means you’ll get tailored solutions for your specific issues, helping to preserve the stone’s integrity.

By recognizing these situations, you can ensure your granite stays shiny and durable for years.

How to Stay on Top of Your Cleaning Goals

Are you having a tough time keeping your space clean and organised? Let’s chat about how you can set and prioritise your cleaning goals to make sure you stay on track with your household chores. We’ll help you determine what areas need cleaning and how to create a schedule that works for you.

We’ve got some fantastic tips to help you clean efficiently, turn cleaning into a routine, and keep your motivation high. With these strategies, you’ll be able to keep your space clean in the long run and say goodbye to clutter and mess for good!

Setting and Prioritising Cleaning Goals

You must set and prioritise cleaning goals to keep your home environment neat. This will help you stay organised, boost your productivity and motivation, and make cleaning much easier and more efficient.

Identifying Your Cleaning Needs

Identifying your cleaning needs is the first step in setting effective cleaning goals. You should start by evaluating high-traffic areas like the kitchen and bathroom, which often need daily attention because they get used often and are germ hotspots. Make sure to give these areas top priority in your cleaning routine.

Remember the less frequented spaces like spare bedrooms or storage areas. They may not need as much cleaning, but you shouldn’t ignore them completely. By organising your cleaning tasks based on importance and how often they need to be done, you can create a structured cleaning schedule that ensures all areas of your home get the care they deserve.

For example, setting aside a weekly deep-cleaning session for the kitchen can help keep this vital space clean and hygienic.

Creating a Cleaning Schedule

Creating a cleaning schedule ensures you stay on top of your chores and manage your time efficiently. Having a daily cleaning routine can help you tackle small tasks consistently, such as making your bed, doing dishes, and wiping down surfaces (like the kitchen countertop, for example). For a weekly schedule, designate specific days for deeper cleaning, like vacuuming, mopping, and dusting. Regarding monthly tasks, focus on areas needing less frequent attention, such as cleaning the fridge, organising your wardrobe, or cleaning windows. Remember to be flexible with your schedule, adjusting as necessary to accommodate unexpected events or changes in your routine.

Effective Cleaning Strategies

Effective cleaning strategies can boost your efficiency and improve your cleaning tasks. This will help you achieve a cleaner and more organised home without putting in as much effort.

Tips for Efficient Cleaning

Following some efficient tips can speed up and improve your cleaning chores. Using the appropriate cleaning supplies for different surfaces helps you save time and guarantees a proper clean. Breaking down your cleaning tasks into smaller, manageable steps reduces stress and makes the whole process easier to tackle.

To maximise productivity, try multitasking, like throwing laundry in while scrubbing a worktop. These easy but powerful strategies save you time, making cleaning less of a drag and more achievable.

Making Cleaning a Habit

Making cleaning a regular habit is crucial for keeping your home clean and organised.

When you’re consistent with cleaning, you maintain a tidy living space and contribute to a healthier environment. To get into the habit of cleaning, try fitting tasks into your daily routine. For instance, you can assign specific days for different chores or divide tasks into smaller, more manageable chunks throughout the week. Having a cleaning schedule can help you stay focused and organised. To keep yourself motivated, consider setting small goals and rewarding yourself once you complete them. Also, keeping cleaning supplies easily accessible can make quick clean-ups more likely and prevent clutter from piling up.

Staying Motivated to Clean

Keeping yourself motivated to clean might not always be easy, but fear not! With the right mindset and clever strategies, you can stay committed and make cleaning a more enjoyable experience.

Rewarding Yourself for Achieving Goals

Rewarding yourself for achieving cleaning goals can boost your motivation and make the cleaning process more satisfying. For example, you could treat yourself to a relaxing spa day, buy a new cleaning gadget you’ve had your eye on, or indulge in a delicious meal at your favourite restaurant. These rewards are incentives to keep you focused and on track with your cleaning tasks.

By acknowledging your progress and celebrating the small wins, you reinforce positive habits and stay motivated to maintain a clean, organised space. Rewarding yourself for completing tasks can create a positive cycle of productivity and satisfaction in your cleaning routine.

Finding Accountability Partners

Having accountability partners boosts your commitment to keeping your home clean and organised. Then you have someone to share your cleaning goals with, it gives you that extra push and support as you tackle the challenges of decluttering and tidying up. Your accountability partners can help you set achievable goals, keep your eyes on the prize, and cheer you on every step of the way.

If you’re looking for like-minded folks, consider hopping into online forums or joining local community groups focusing on home organising. Chat with friends or family on the same cleaning wavelength as you. Establish clear lines of communication and set up regular check-ins to keep each other motivated and offer a helping hand when needed.

Maintaining Cleanliness in the Long Term

To keep your place clean for the long haul, you’ve got to put in the work, use smart strategies, and stay on top of those regular tidying-up tasks. This is how you ensure your home remains neat and clutter-free for the long haul.

Strategies for Preventing Clutter and Mess

Preventing clutter is crucial to keeping your home organised and orderly. Regular decluttering sessions can do wonders in stopping unnecessary items from piling up and keeping surfaces clear.

Set aside time each week to tackle different areas of your home and ditch items you no longer need. This will ensure a clutter-free environment. Use storage solutions like bins, baskets, and shelving to maximise your space and keep things neatly tucked away.

Getting into the routine of putting things back where they belong after use is also crucial in preventing clutter and keeping your living space efficient.

Regular Maintenance Tasks

Regular maintenance tasks ensure that your home stays clean and well-maintained over time. Daily tasks like making the bed, wiping down worktops, and quickly sweeping can keep your home organised. Don’t forget those weekly tasks—hoovering, mopping floors, and changing bed linen help maintain a fresher living environment.

For monthly maintenance, focus on cleaning the fridge, washing windows, and decluttering cupboards. Incorporating these tasks into your routine can prevent dirt and grime from building up, making it easier to keep a clean and welcoming home. Remember, consistency is critical to maintaining a clean living space.

The Top Five Uses Of Vinegar In Home Cleaning

I am a big fan of vinegar – it’s like a cleaning superhero that can work wonders around the house. Whether I need to tackle tough stains or freshen up the laundry, vinegar is my go-to for all things cleaning.

Let’s discuss the top five ways I can use vinegar for cleaning at home. I’ll learn how it works its magic, which household surfaces and stains it can handle, and some handy tips on how to use vinegar safely and effectively. Get ready to see the true cleaning power of vinegar in action—it’s time to make my home shine!

What Makes Vinegar So Effective For Home Cleaning?

I always keep vinegar to hand for cleaning around the house. It’s a game-changer! Derived from ethanol fermentation, vinegar packs a punch with acetic acid, giving it that tangy kick and strong cleaning powers.

Vinegar’s secret sauce is its acetic acid, which gives it serious antibacterial and deodorising properties. And get this—it’s totally safe to use around my little ones and furry friends. Plus, it’s eco-friendly and biodegradable, so I can scrub away without worrying about harming the planet.

Whether I’m tackling tough stains on worktops or freshening up laundry, vinegar effortlessly does it all. It’s my go-to for all things cleaning—versatile, effective, and budget-friendly. No wonder it’s a natural cleaning superstar in households everywhere!

Bottles of vinegar in a restaurant setpiece

General Uses for Vinegar in Home Cleaning

Vinegar is my best friend when it comes to cleaning my home. It’s eco-friendly and so versatile! I love how its natural cleaning powers make it perfect for all kinds of surfaces and tasks.

Joint Household Surfaces and Stains

I love how versatile vinegar is! It’s not just for salad dressings; it’s a superhero for household cleaning, too. Whether I’m dealing with stains or grease or just want things to sparkle, vinegar is my go-to solution.

And let’s talk about glass – vinegar leaves my windows and mirrors streak-free, which is a game-changer. The acidity of vinegar is like a secret weapon against soap scum on my shower doors. Plus, it’s gentle enough to use on delicate surfaces like my granite countertops. And don’t get me started on stainless steel appliances – a mix of vinegar and water can easily wipe away fingerprints and smudges, making everything look brand new.

But here’s the real magic: mixing vinegar with baking soda is like a science experiment that works. The foaming action tackles tough stains on my kitchen counters and sinks like a pro. Who knew vinegar could be this amazing?

Using Vinegar for Specific Cleaning Tasks

I’ve found that vinegar is like a superhero when it comes to cleaning – it’s my go-to for both the kitchen and bathroom. This stuff works wonders as an odour eliminator disinfectant and can handle just about any cleaning job you throw at it.

Removing Odours and Freshening Laundry

I love using vinegar in my laundry routine because it’s not just for salads! This stuff works wonders as a natural odour eliminator, laundry freshener, and fabric softener. Plus, my clothes smell fresh and clean without harsh chemicals.

Vinegar is like the MVP of my laundry game—it does double duty as an odour fighter and fabric softener. All I have to do is add a little vinegar to the rinse cycle, and it helps get rid of funky odours, make my fabrics soft, and even enhance the colours. And the best part? Vinegar is gentle enough for sensitive skin, so I never have to worry about irritating residues that other laundry products can leave behind. It’s a win-win for my clothes and me!

Sanitising and Disinfecting Surfaces

I love using vinegar as a powerful sanitiser for surfaces. Its disinfectant properties are top-notch when it comes to combating germs and bacteria. Plus, being a natural antimicrobial agent, vinegar is my go-to eco-friendly solution for keeping different areas in my home clean.

Vinegar can tackle a wide range of bacteria and viruses, making it so popular as a natural cleaning option. I prefer using vinegar over harsh chemical cleaners since it’s non-toxic and biodegradable, which is a win-win for me and the environment. Vinegar can easily break down dirt, grime, and even annoying odours thanks to its acidic nature. Adding vinegar to my cleaning routine helps create a healthier living space and supports sustainability efforts. It’s like a cleaning superhero in a bottle!

Unclogging Drains and Cleaning Appliances

Vinegar is like a superhero in terms of taking care of my home. It unclogs, drains and spruces up appliances. Plus, it’s all-natural and safe for the environment, so it’s a win-win for me!

The acetic acid in vinegar is like a tough detective—it cuts through grease and dirt and even acts as a germ-busting disinfectant without harsh chemicals. To tackle stubborn clogs, I just mix vinegar and baking soda, pour it down the drain, and then follow it up with hot water to bust through any blockages.

When it’s time to clean my appliances, like the microwave or coffee maker, a simple mix of water and vinegar does wonders for naturally wiping out stains and odours. Using vinegar regularly in my cleaning routine can prevent expensive repairs and keep my home planet-friendly. It’s like a little bottle of magic for my cleaning needs!

Tips for Using Vinegar Safely and Effectively

When using vinegar as a cleaning powerhouse, I always make sure to handle it with care and know what I’m doing. Getting the right dilution, being cautious with different surfaces, and keeping that pH balance in check are the secrets to making the most of vinegar’s eco-friendly cleaning perks.

Proper Dilution and Storage

Getting the right mix of vinegar is critical for cleaning without messing up your surfaces. And let me tell you, storing vinegar properly is a game-changer for keeping it potent for all your DIY cleaning needs.

When I blend vinegar with water for cleaning, I always make sure to get the ratio right to avoid streaks or residue on my surfaces. For everyday cleaning, I go with the classic equal parts vinegar and water combination—it’s like a trusty sidekick for any mess. But I might need to up the vinegar game when dealing with those stubborn stains.

As for storage, I keep my vinegar in a cool, dark spot, far away from sunlight or heat. Sealing it up tight in a container not only keeps it fresh but also ensures it stays effective for the long haul.

Precautions for Certain Surfaces and Materials

I always reach for vinegar when it comes to cleaning, but I know I’ve got to be careful with certain surfaces and materials. I steer clear of using vinegar on non-abrasive or delicate surfaces to avoid any damage and ensure my household chores are safe and effective.

For surfaces like granite or marble, I remember to dilute vinegar with water because the strong acidity of undiluted vinegar can etch those materials. If I’m using vinegar as a disinfectant, I let it sit on the surface for 10-15 minutes before wiping to make sure all those germs are really gone.

Vinegar is awesome for tackling grease and grime in the kitchen, but I’m careful around wooden items because it might mess with the finish. I do a spot test in a hidden area first to check if it’s safe to go all in with the vinegar.

Five Simple Tricks To Improve Your Home Cleaning Efficiency

Having a clean home is not just about appearances—it can also significantly impact your overall well-being. We will discuss the benefits of a clean house and share five simple tricks to improve your home cleaning efficiency. These tips will help you maintain a clean and organised living space, from creating a cleaning schedule to involving the whole family. Let’s get started and make your cleaning routine a breeze!

Why Is Home Cleaning Important?

Home cleaning is crucial in maintaining a healthy living environment for homeowners and residents. Regular cleaning not only improves the house’s aesthetic appeal but also contributes to the overall well-being of the family members.

Living in a clean and organised home can have numerous benefits for individuals. A tidy living space reduces the risk of allergies by eliminating dust and allergens, thus promoting better respiratory health.

A clutter-free environment can help reduce stress and anxiety, leading to a happier and more relaxed atmosphere. Regularly cleaning and disinfecting surfaces can prevent the spread of germs and illnesses within the household, fostering a healthier living environment for everyone.

Trick 1: Create A Cleaning Schedule

One of the simplest tricks to improving home cleaning efficiency is to create a detailed cleaning schedule that outlines specific tasks to be done daily, weekly, and monthly. This systematic approach helps maintain a tidy and organised living space.

By setting aside dedicated time for various cleaning tasks, individuals can ensure that every aspect of their home receives the attention it deserves.

Prioritising tasks based on their importance and frequency can effectively manage cleaning.

Involving family members in the cleaning schedule not only shares the responsibility but also fosters a sense of teamwork and cooperation.

Consistency is key to keeping a home clean and inviting, and a well-thought-out cleaning schedule can significantly help achieve this goal.

How To Create A Cleaning Schedule?

Creating a cleaning schedule involves several key steps, starting with assessing the cleaning needs of each room and identifying the frequency of tasks. Utilise tools like checklists and apps to help plan and track cleaning activities efficiently.

Next, consider assigning specific tasks to certain days or times to maintain a consistent cleaning routine. Prioritise tasks based on urgency or frequency, ensuring that essential chores are tackled first. Setting achievable goals for each cleaning session can help you stay motivated and prevent overwhelm. Utilise time-blocking techniques to allocate dedicated time slots for cleaning, allowing for better focus and efficiency. Review and adjust your schedule periodically to adapt to changing needs or circumstances.

Trick 2: Declutter First

Before starting the cleaning process, it is essential to declutter and organise the living space. Removing unnecessary items and clutter makes cleaning more manageable and contributes to a sense of spaciousness and neatness.

Clutter in spaces like cupboards, shelves, and worktops can create a feeling of chaos and disorganisation that can be overwhelming. When you take the time to go through these areas and remove items that are no longer needed or used, you create space for things that truly matter.

By sorting through belongings and categorising them, you create a more visually appealing environment and make it easier to find and access the things you need. This decluttering process also positively impacts mental well-being, fostering a sense of calm and reducing stress levels.

How To Declutter Effectively?

Effective decluttering involves systematic sorting, categorising, and decision-making on items to keep, donate, or discard. Utilise storage solutions and organisation hacks to maximise space and create a clutter-free environment.

In the bedroom, start by going through your clothes, shoes, and accessories. Consider donating items you haven’t worn in the past year. Use drawer dividers or hanging organisers to optimise storage.

For kitchen decluttering, open out expired pantry items and remove utensils you no longer use. Utilise vertical space with wall-mounted racks or shelves.

In the living room, assess decorative pieces and remove any that no longer suit your style. Invest in multi-functional furniture, like ottomans with storage compartments, to maximise space.

Trick 3: Use Multi-purpose Cleaners

Opting for multi-purpose cleaners can significantly enhance cleaning efficiency by eliminating the need for multiple specialised products. These versatile cleaners save time and effort while providing effective results across various surfaces.

Their ability to tackle different cleaning tasks in various areas of the house makes them a convenient choice for busy individuals. Multi-purpose cleaners offer a one-stop solution for kitchen worktopsbathroom tiles, and even glass surfaces. By investing in quality multi-purpose cleaners with antibacterial properties, one can ensure not just cleanliness but also a hygienic environment. Look for environmentally friendly products free of harsh chemicals to protect your home and the planet.

What Are The Benefits Of Multi-purpose Cleaners?

Multi-purpose cleaners offer a cost-effective and time-saving solution for household cleaning tasks. Their versatility allows for efficiently cleaning various surfaces with a single product, reducing clutter and streamlining the cleaning process.

These cleaners are known for their convenience, as they eliminate the need to purchase multiple specialised cleaning products. It saves money and frees up valuable storage space in your home. Using a multi-purpose cleaner, you can tackle different cleaning jobs without switching between various products, making your cleaning routine more organised and efficient. With their simplicity and effectiveness, multi-purpose cleaners are a practical choice for maintaining a clean and tidy home.

Trick 4: Clean From Top To Bottom

Cleaning from top to bottom is a strategic method that removes dust and debris efficiently without recontaminating cleaned areas. This approach maintains a systematic cleaning order and results in a more thorough and effective cleaning process.

Dusting high surfaces such as ceiling fans and shelves prevents dust from falling onto lower areas that have already been cleaned. Moving downwards and cleaning walls and windows before tackling furniture and floors ensures that all surfaces are spotless. This systematic approach saves time and guarantees a more pristine outcome, leaving your living spaces looking and feeling refreshed. Following this cleaning order can achieve a genuinely impeccable and tidy home.

Why Is It Important To Clean From Top To Bottom?

Cleaning from top to bottom is essential to ensure the cleaning process is efficient and effective. Dust and dirt are managed systematically by starting from higher surfaces and gradually working downwards, resulting in cleaner and tidier living spaces.

This approach minimises the chances of recontamination as gravity facilitates the downward flow of debris, ensuring that any particles dislodged from higher surfaces fall onto areas that have not yet been cleaned. Following a proper cleaning sequence, such as dusting shelves before vacuuming the floor, can prevent the spreading of dirt and germs to already cleaned areas. By saving floor cleaning for last, you avoid repeating this step if dust or debris falls from above during the cleaning process, thus optimising cleaning efficiency.

Trick 5: Involve The Whole Family

Getting the whole family involved in the cleaning process not only lightens the workload but also fosters a sense of teamwork and instils good cleaning habits in family members.

It’s essential to involve every family member, regardless of age, in cleaning activities. Including children in these tasks teaches them valuable life skills and reinforces the idea of shared responsibilities within the household. Assigning age-appropriate tasks ensures that everyone can contribute effectively, creating a collaborative environment where each person’s efforts are valued. This shared effort cultivates a sense of unity and cooperation as everyone works together to maintain a clean and organised living space.

How To Get The Whole Family Involved In Cleaning?

Encouraging family members to participate in cleaning tasks requires effective communicationclear expectations, and a positive and rewarding cleaning environment. Establishing a routine and acknowledging contributions can motivate family members to engage in household cleaning.

One practical tip to involve the whole family in cleaning activities is to create a chore chart that clearly outlines everyone’s responsibilities. This visual aid helps distribute tasks evenly and holds each member accountable. Setting up incentives, such as rewards or special treats for completing chores, can make cleaning more enjoyable and encourage active participation. Building a cooperative cleaning atmosphere by emphasising teamwork and praising efforts can foster a sense of unity and shared responsibility among family members.

How To Maintain Wood Type of Flooring?

Before starting to wash wood flooring, you should understand whether it is surface-sealed or penetrating-sealed.

When running a finger across the material, notice if there is a streak or not.
In case you cannot see any trace, that means the type of flooring is surface-sealed. It is crucial never to use boiling water and abrasive substances.


If the flooring is oil- or penetrating-sealed, vacuuming and dry mopping should be the best option to protect the wood. Products that contain acrylic or are water-based can cause inevitable damages.


It would be wise to have a soft-bristled broom angled in the storage space because it can help you to clean the corners thoroughly. Choose a wide-enough one to get rid of the dust and grime rapidly and effectively.


Some experts recommend using a vacuum with a soft floor nozzle.


Wet and sticky spills are the biggest enemies of the wood. Use appropriate cleaners and soft damp cloths. Overly wet mopping increase the speed of the tear and wear process.

Forget the steam cleaning. Over time moisture deform the natural material.